Hey everyone, welcome to our recipe page, If you're looking for recipes idea to cook today, look no further! We provide you only the perfect Hand Kneaded and Very Useful Standard Bread recipe here. We also have wide variety of recipes to try.
Before you jump to Hand Kneaded and Very Useful Standard Bread recipe, you may want to read this short interesting healthy tips about Healthy Eating Doesn’t Need To Be A Chore.
Making the decision to eat healthily offers great benefits and is becoming a more popular way of living. Poor diet is a leading factor in diseases such as heart disease and high blood pressure which can put a drain on the economy. While we’re constantly being encouraged to stick with healthy eating habits, it is also easier than ever to depend on fast food and other convenience items that are not good for us. It is likely that lots of people feel it will take so much effort to eat a healthy diet or that they have to make a large scale change to how they live. In reality, though, simply making a couple of minor changes can positively affect daily eating habits.
One initial thing you can do is to pay close attention to the choices you make when you’re shopping since you most likely pick out a lot of items out of habit. For example, in all likelihood you have never checked the box of your favorite cereal to find out how much sugar it has. Having a bowl of oatmeal will supply you with the energy to face the day while protecting your heart at the same time. By adding fresh fruit, you can improve the flavor and, before you know it, you will have made a positive change to your diet.
Hence, it should be fairly obvious that it’s not hard to add healthy eating to your everyday life.
We hope you got benefit from reading it, now let’s go back to hand kneaded and very useful standard bread recipe. To make hand kneaded and very useful standard bread you only need 10 ingredients and 29 steps. Here is how you cook that.
The ingredients needed to prepare Hand Kneaded and Very Useful Standard Bread:
- Use 300 grams ●Bread flour
- Provide 10 grams ●Skim milk powder
- Get 4 grams ●Salt
- Prepare 15 grams ☆Raw sugar (or caster sugar or light brown sugar)
- Provide 40 grams ☆Egg
- Use 170 grams ☆Water: Use lukewarm water during winter
- Take 5 grams ☆Dry yeast
- Use 20 grams ◎Butter
- Use 1 Egg or milk for eggwash/glaze: Use whichever depending on the type of bread you are making
- Use 1 Topping: Depends on the type of bread you are making
Steps to make Hand Kneaded and Very Useful Standard Bread:
- Place the ingredients marked with ☆ in a bowl and mix with a whisk.
- Place the ingredients marked with ● in a separate, large bowl and mix well with a dry whisk.
- Using either your hand or a rubber spatula, make a depression in the middle of Step 2, then pour the Step 1 ingredients into it.
- Combine the flour and the liquid by mixing from the middle and outward using either your hands or a rubber spatula.
- Turn out onto a working surface once the dough has more or less come together. Use a dough scraper to get all of the flour that is stuck on the sides of the bowl.
- The dough will still be quite sticky at this point, but that is okay. Knead the dough onto the surface, then combine again with a dough scraper; do this several times.
- If you repeat Step 6 several times, the dough will become easier to handle and will stick less to the surface.
- Grab an edge of the dough and slam it onto the surface.
- Once you slam the dough, fold it over, and…
- Hold an edge of the dough, rotate it 90 degrees so that it faces the same direction as in Step 8, and slam again. Repeat several times.
- When the dough is no longer sticky, fold it toward you, stretching out the surface of the dough, and…
- Push down with the heel of your palm. Repeat for about 10 minutes, occasionally using the motions from Steps 8~10.
- Once the dough has become glossy, cut a part of it with a dough scraper and stretch it out carefully. You will be able to see your fingers through the dough without it tearing if gluten has formed.
- Once the gluten has formed, spread the dough out. Place room-temperature butter in the middle, and wrap the dough around it.
- Combine the butter with the dough with a tearing motion. The dough will come apart, but it will come back together soon since gluten has been formed (Step 13).
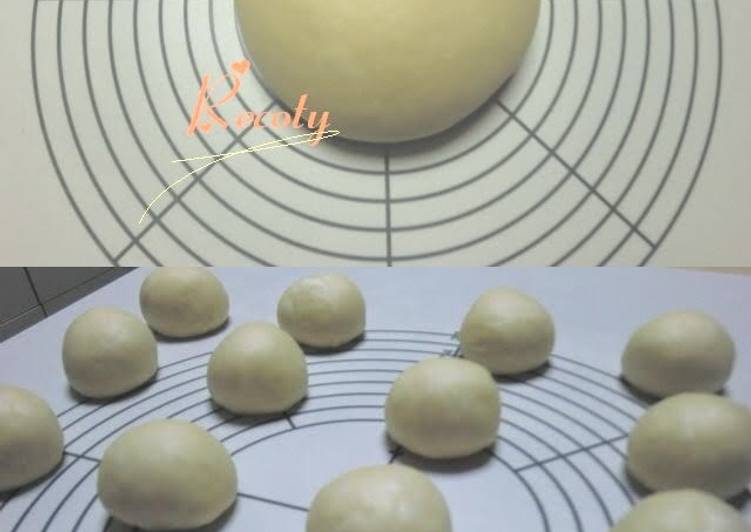
- Repeat Steps 8~12 for about 10 more minutes until the surface is springy and shiny. Form into a ball by stretching the surface of the dough and pinching it at the bottom.
- Place the dough ball in a greased bowl and let it rise. If your oven has a proofing setting, then put it in there at 30℃ for about 45 minutes. You could also cover the bowl with plastic and leave it at a warm place.
- It has doubled in size. The time is just a guideline, so you should check the dough to see if it is done. Put some flour on your finger and poke a hole in the dough. If the dough does not spring back, then it is ready.
- Once the dough has risen, turn out onto a working surface and punch out the gas by pushing down the whole thing. You could put extra flour on it if it is sticky, but I almost never do.
- Divide into portions depending on your liking and the type of bread you are making.
- Form the divided portions into a ball by folding it in on itself, then let them rest for 10~15 minutes. Leave them at room temperature, but cover with plastic wrap or damp cloth to keep them from drying.
- After resting the dough, shape them into the shape you like. Then let the dough rise again, in the same way as the first time for 35~45 minutes. It will become 1.5~2x the original size.
- Let the shaped dough rise on the baking sheet with which you will be baking. When they have risen…
- If you like, brush on the egg wash to add gloss and color to the bread. In which case, the egg left over from the dough making process should be more than enough.
- Bake in an oven oven that has been preheated to 200℃ for about 12 minutes. Please adjust oven temperature and baking time depending on your oven and the shape of your bread.
- The amount of liquid that is needed depends on the type of flour you use as well as the temperature and season. Until you get used to it, it would be good to leave out 1 tablespoonful of water in the beginning to see if you need it when you start kneading.
- I used the Haruyutaka brand and the Golden Yacht brand flours this time at a 1:1 ratio.
- Even if you are using a bread maker, wait until the gluten has formed before you add the butter. I really like to knead by hand.
- Little Anpan Made with Standard Bread - - https://cookpad.com/us/recipes/144812-mini-anpan-with-hand-kneaded-classic-bread-dough
Covered and left for ten minutes. I prepared and baked the bread machine and hand-kneaded pretzel dough batches the same way for the Every pretzel was edible and delicious. My family was very pleased with each batch and all the topping variations! A wide variety of hand kneading bread options are available to you, such as material, local service location, and key selling points. You can knead most bread doughs by hand or in a stand mixer (we'll show each technique in detail below).
If you find this Hand Kneaded and Very Useful Standard Bread recipe valuable please share it to your close friends or family, thank you and good luck.